How to Wall Mount Your TV with Hidden Cords for a Clutter-Free Look
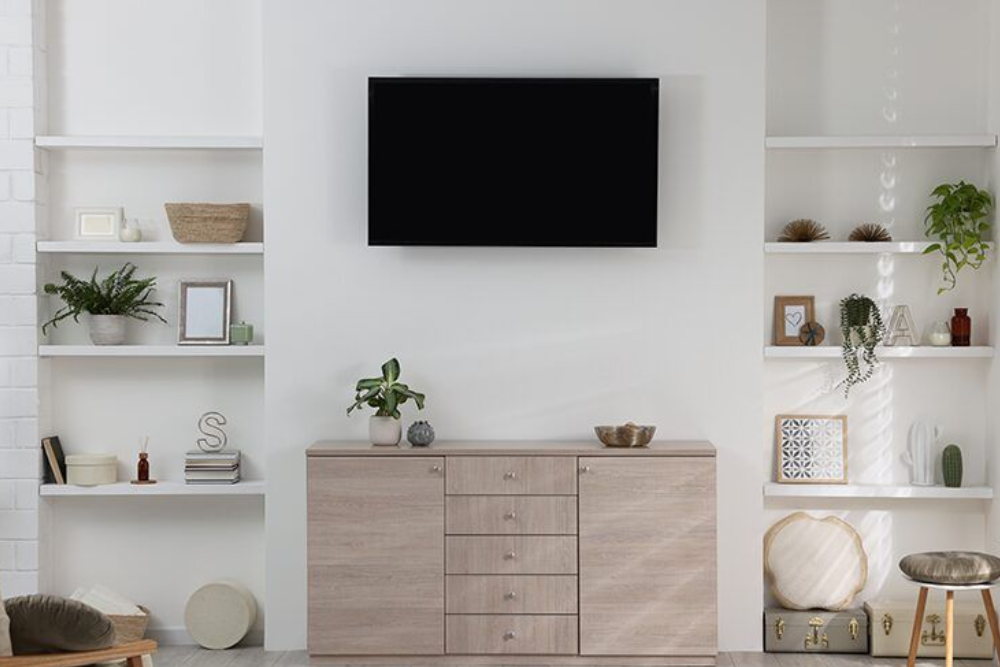
Televisions provide endless entertainment, but visible cords can sometimes disrupt the aesthetic appeal of a room. Fortunately, mounting your TV on the wall and concealing the wires can greatly enhance the overall appearance. In this comprehensive guide, we will walk you through the step-by-step process to wall mount your TV while ensuring that all cords are neatly hidden.
Step 1: Assess Additional Components and Consider Wireless Options
Take stock of the additional components connected to your TV, such as media boxes, game consoles, routers, and cable boxes. These devices often come with their own cords, which can contribute to wire clutter. Consider utilising wireless alternatives for some of these components to minimise the number of cords required.
Step 2: Obtain a Wall Mounting Kit and Read the Instructions
To ensure a secure and proper installation, purchase a wall mounting kit that is compatible with your TV. These mounting kits are available at electronics stores or online retailers. It is crucial to choose the correct kit that matches your TV model. Carefully read and follow the instructions provided in the kit, as they will guide you through the installation process and make it easier for you.
Step 3: Seek Permission and Choose a Suitable Wall
If you live in a rented property, obtain permission from your landlord before proceeding with the wall mount installation. Choose a wall that is hollow and not made of concrete or brick. Ideally, select a wall that is located in a central position in the room for optimal viewing angles. Prior to mounting, mark the desired position of your TV on the wall using tape. This will serve as a visual reference during the installation process.
Step 4: Preparation for Concealing Wires
To achieve a clean and organised look, it is essential to plan for wire concealment. Consider using fish tape, a thin and flexible tool, to guide and route the wires through the walls. This will help hide the cables and minimise their visibility.
Step 5: Secure the Brackets to the TV
Using a screwdriver, securely attach the brackets to the back of your TV. Locate the screw holes designed explicitly for brackets. Remove the existing screws from these holes, ensuring that they are stored safely for potential future use. Once the brackets are securely attached, handle the TV with care throughout the installation process, avoiding placing it on the ground or any unstable surface.
Step 6: Choose the Suitable Mounting Method
Select the appropriate mounting method based on your preferences and requirements. There are different types of brackets available, offering various features such as static positioning or full-motion options. Consider factors like room layout, viewing angles, and flexibility to determine the best choice for your needs.
Step 7: Conceal Wires within the Wall
For a truly seamless and clutter-free look, you can install an in-wall cord system. Begin by drilling two holes—one behind the TV and another behind your media console or any other relevant component. These holes should be large enough to accommodate a narrow plastic tube. Insert the plastic tube through the drilled holes, ensuring it is securely in place. The tube acts as a conduit, allowing all the wires to be discreetly fed through the wall, keeping them hidden from view. If you are a tenant or prefer not to drill large holes, an alternative option is to attach the plastic tube to the wall’s surface using adhesive or mounting brackets. Paint the tube with a colour that matches your walls to make it blend seamlessly and minimise any noticeable damage.
Step 8: Consider Decorative Moulding for Wire Concealment
Another option for hiding wires is to utilise decorative moulding. This method involves attaching moulding along the wall to create a visually appealing cover for the wires. While this approach requires less drilling and causes minimal permanent damage, it may involve more effort and craftsmanship. There are numerous online resources available that provide detailed instructions and ideas for creating decorative wire concealment using moulding. Once the moulding is securely in place, paint it to match the colour of your wall, ensuring a cohesive and integrated look.
Step 9: Organise and Label Cords for Easy Identification
To further enhance the organisation and accessibility of your TV setup, it is recommended to organise and label the cords. Use zip ties or cable management solutions to gather and secure the cords together, reducing tangling and creating a cleaner look. Additionally, label each cord or cable with adhesive tags or coloured tape to identify their respective devices. This will make future troubleshooting or adjustments much simpler and more efficient.
Step 10: Perform a Safety Check and Test the Setup
Before considering the installation complete, it is essential to conduct a safety check and test the wall-mounted TV setup. Ensure that all brackets, screws, and connections are securely fastened to prevent any accidents or damage. Double-check that the TV is stable and level on the wall mount. Carefully examine the wire concealment to confirm that no loose cables are exposed. Once the safety check is complete, turn on the TV and test the functionality, ensuring all devices are properly connected and functioning as intended. Adjust the viewing angle and make any necessary tweaks to achieve optimal comfort and visibility.
Final words
Wall mount your TV and achieve a clutter-free appearance by hiding the cords. Carefully assess your additional components, choose the right wall mounting kit, and secure the brackets to your TV. Plan for wire concealment and select the suitable method, whether it be an in-wall cord system or decorative moulding. With a wall-mounted and hidden cords, you will enjoy a visually appealing and organised space for optimal TV viewing. If you find the process overwhelming, don’t hesitate to seek the assistance of a handyman to ensure a seamless and hassle-free installation experience.

